 |
|||||||
|
If you fool around with a thing for very long, you
will screw it up. |
|||||||
|
|
|||||||
|
|||||||
Start |
Open the roofless house you created in Tutorial 2. You
should have four layers: Front Side Back BG or Scenery Set your foreground color: none. |
||||||
Don't forget to save your work after creating each layer! |
|||||||
New Layer: House back |
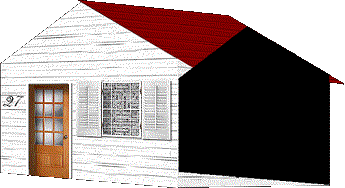
Highlight and duplicate the Front layer. Select any part of the image that is NOT the front of the house with the magic wand. Invert the image. (CTRL+I) Flood fill with black. Rename the Merged layer to Back.. The back of the house is smaller than the front. From the Image menu, choose Resize. Percentage of original = 85%. Resize type: Smart size. Make sure that "Resize all layers" is NOT checked, but that the "Maintain aspect ratio" box IS checked. Click OK. Deselect. (CTRL+D.) |
||||||
Move the Back layer |
Using the Mover tool, move the smaller black image to the
right until the middle of its gable top is at about 400 on the top ruler. Move the Back layer under the Front layer. It doesn't matter where you move the back or how much you reduce the back. This perspective is now based on the correct vanishing point. If you're lying on the grass (LOL) looking UP at the house, the back will be higher than the front. |
||||||
New layer: Roof |
This is even easier than the roof without an overhang in
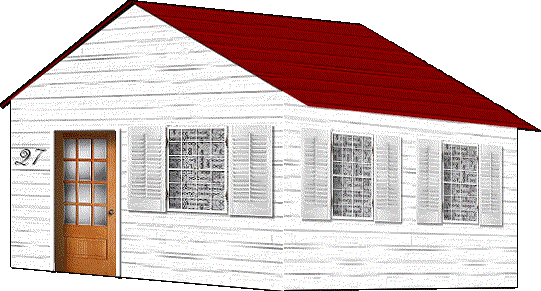
Tutorial 1. Draw a rectangle selection from the top of the front gable to somewhere below the top first board of its right wall. Flood fill with red. Use either the same texture you used for the walls or whatever else you like. You can see the perspective better with a texture. |
||||||
Deforming the Roof
|
Using the Deformation Tool and holding the SHIFT key, move
the middle bottom handle down so that the angle of the roof is the same as
the angle of the gable. You might want to release the SHIFT key at this point and move the middle right handle so that the roof barely covers the back of the house. Using SHIFT again, move the middle right handle down to the top of the back gable peak. |
||||||
 |
After you apply the deformation, you can double check
yourself by moving the Back layer up to the top to see if it lines up. You
can delete the Back layer if all is well. It's fine if the top of the roof is just to the left of the front gable. |
||||||
New layer: Roof underneath |
Draw a line on the horizontal edge of the roof, the same
color as the roof.. Single Line Width=6 Antialias=checked Everything else unchecked Either use a darker color than you did for the roof or SHIFT+B with the Brightness at15 and the Contrast at 0%. (This part of the roof that you see will be lighter if the sunlight is coming from the upper left.) |
||||||
New layer: Roof side |
Draw a line from the gable top to the line of the
horizontal right side of the roof. Zoom in. Using the Lasso Tool, make sure the ends of the line are vertical by drawing a selection(s) and erasing the bit(s) that don't belong. |
||||||
New layer: Roof left |
Give the roof a left side by drawing a line from the gable
top to a little below and left of the left side of the house.
Technically, this isn't finished, so you can zoom in and use the Lasso Tool to create a little triangle under the line to the side of the house to show that the roof is 3-D. Flood fill it with the same color. Since the left side of the roof is against the sun, you might want to use SHIFT+B to darken it to about Brightness minus 15, no Contrast. |
||||||
|
|||||||
| There are now tutorials for windows and shutters. | |||||||
